Mum’s Pumpkin Soup

Pumpkin Soup

This is the recipe for my Mum’s pumpkin soup, and it’s pretty easy to make. The hardest part is cutting all the skin off the pumpkin!
It’s a great winter warmer (for those of you who are heading into winter, like me), but is also light enough to eat year-round.

The amounts of everything in this soup are pretty rough – if you have slightly more or slightly less of an ingredient, it will not be the end of the world.

Serves 8 (approximately)

Ingredients

  • 2kg pumpkin, in 1-inch cubes – I prefer jap pumpkins, because they’re cheap and not stringy when they cook up. Butternut is also good, but they are more expensive.
  • 4 large brown onions, sliced
  • 40g butter
  • 3 vegetable stock cubes (or the amount of stock powder you’d use to make 1.5L of stock)
  • 1L of water
  • 1 square of a curry block (I use this one, which I can get from my local supermarket. Any curry powder/seasoning will do, adjust amount to your taste preferences)
  • 2 tbsp sour cream

Method

  1. Heat butter in a stock pot (I use a 5L one) over medium heat. Add sliced onions and cook until translucent and beginning to caramelise.
  2. Add curry, stock cubes, pumpkin, and water to pot and stir. The water will not cover all the pumpkin to start with, but you don’t need to add more.
  3. Bring to boil over medium heat, then reduce heat to low and cook covered for 20mins or until pumpkin cubes are soft and cooked through. Stir occasionally to ensure even cooking.
  4. Remove lid and cook for a further 10mins uncovered (if you like watery soup, skip this step. It helps thicken the soup).
  5. Remove pot from heat and allow to cool for approx 20mins before pureeing. I use a stick blender and do this in the pot, but if you only have a bench-top blender, ensure there are even amounts of solids and liquid in each load through the blender.
  6. Return pureed soup to pot (if you took it out) and bring to boil over high heat. Taste soup at this point and add any extra seasonings. Stir through sour cream and serve.

Variations

  • Thai pumpkin soup – use red curry paste and swap out the sour cream for 1/2 cup coconut cream. Garnish with coriander.
  • Budget variation – if pumpkin is expensive where you live, swap out half the pumpkin for potatoes/sweet potatoes. You can hardly tell the difference! You can also extend the recipe using the same theory – double the ingredients, and make up the additional 2kg of vegetables with potatoes and sweet potatoes. The sweet potatoes help preserve the orange colour of the soup, which can get a bit watered down if you just use white potatoes.
  • +Protein variation – pre-soak 1 cup of red lentils and drain. Add to soup with the pumpkin and continue as normal. Pre-soaking means you will not need extra liquid in the recipe. Red lentils work best as they are the same colour as pumpkin when cooked, don’t have skins, and cook down to mush very quickly.
  • Slow cooker – very easy to make in the slow cooker. Caramelise the onions on the stove first, then add all ingredients to the pot. You will want to reduce the liquid by about 1/3, but DO NOT reduce the number of stock cubes. Cook on Low for approx 6hrs – more is fine. If you are cooking for less than 6hrs, cook on High. Skip the “cook uncovered” step.

This recipe freezes well. It may separate a little when defrosting, just mix it all up again.

~K

Slow Cooker Chicken Noodle Soup

IMG_3201

I set this awesome soup going while I was out on Monday, and it’s turned out SO GOOD. It doesn’t have the Hubby seal of approval (because it is soup and he isn’t a fan of soup, so he hasn’t even tried it yet) but I reckon it’s fantastic. It has officially risen to the position of “Go-To Chicken Soup Recipe” in my collection.

The recipe came out of an old recipe book that I got from an op shop. I suspect the book is from the early 80s or something, some of the recipes are a *little* bit scary… (There’s a recipe for one of those savoury jelly salad cake things. It contains calamari. UGH!)

This recipe has a GF variation (see end of recipe).

Serves: 6-8 (ish) – could serve up to 10, depends on how much water you add and how hungry you are.

Ingredients:

  • 2L chicken stock
  • 2 chicken breasts, chopped (or 4 thighs)
  • 3 stalks celery, chopped
  • 1 onion, chopped
  • 1 large leek, chopped
  • 2 carrots, small dice
  • 2 tsp crushed garlic (as always, I used about twice as much garlic)
  • 2 tsp vege stock powder (or 1 cube – whatever amount makes 500ml stock)
  • 410g can creamed corn
  • 1 cup frozen peas
  • 1 cup frozen corn
  • 375g packet egg pasta, broken up
  • 500g chinese cabbage, shredded

Method:

  1. Saute onion, leek, garlic and celery until beginning to soften. I did this in my slow cooker itself, as I have a saute function. This saute step was not included in the original recipe, so you could probably skip it if you don’t want to dirty a separate pan and you can’t saute in your slow cooker.
  2. Put all ingredients EXCEPT frozen veg, pasta and cabbage into the pot. Add a little more water if required (I didn’t need to). Cook on LOW for 6-8hrs.
  3. At the last 30mins of cooking time, add cabbage, frozen veg and pasta.
  4. Serve and enjoy 🙂

Disclaimer – there is no cabbage in the photo, because I forgot to add it! I’d chopped the cabbage up when I prepped everything at the start, and then put it back in the fridge… so I sort of forgot about it when I put the pasta and frozen veg in (because I didn’t check the recipe again). By the time I realised, it was far too late. I would have killed the pasta if I’d cooked it for another 30mins when I realised I’d forgotten.

Variations: If you’re gluten free, you could easily make this GF by just skipping on the pasta. Cabbage (if you chop it the right way) is an EXCELLENT pasta analogue in soups.
You could also add whatever veges you happen to have around the house if you wanted to, but make sure you add hard veg (potatoes, carrot, swede, etc) at the start of cooking, and soft veges (cabbage, zucchini, spinach) in that last 30mins.

~K

Shoyu Ramen

IMG_2392

I’ve adapted my recipe for this ramen from Just One Cookbook’s “Spicy Shoyu Ramen” recipe.

Their recipe makes a 2 person serve, and uses some ingredients that I have had some trouble getting for a reasonable cost. I’ve adapted it to use ingredients that I pretty much always have in the pantry, and to use cheap ingredients.

Serves: 1

Ingredients:

  • 1 tsp minced garlic
  • 1 tsp minced ginger
  • 1 tsp cooking sake
  • 1 tbsp soy sauce
  • 1 tsp sweet chilli sauce
  • 1 chicken stock cube (or 2 cups premade dashi stock)
  • This dry ramen – the packet contains 3x 90g “serves”, I use 1/2 of a “serve” for 1 person
  • 1/2 cup frozen peas & corn
  • 2 rashers bacon, cut into large pieces (sometimes I’m lazy and just tear it up to save on cleaning)
  • Chopped green/spring onions (whatever you want to call them)
  • Some nori squares
  • whatever other toppings you want – enoki, chicken,spinach, a soft-boiled egg, whatever you’d like!

Method:

  1. Put a little oil into a small saucepan (I generally use my little 1L pan for this) and cook garlic & ginger until fragrant.
  2. Add sake, soy sauce, sweet chilli sauce and stock cube to pan along with 2 cups of cold water. Bring to boil.
    *NOTE – if you are using premade dashi instead of the chicken stock cube, leave out the water. If you are using dashi granules, just replace the stock cube with the appropriate amount of granules*
  3. Once boiling, add ramen and cook for 2mins then add peas & corn and bacon. Cook for a further 2 mins, or until ramen is cooked. Add chopped green onions about 30 seconds before you take the pot off the heat, to allow them to flavour the
  4. Transfer to a large bowl, top with nori and serve immediately.

How it is different from the original

  • I can’t get the chilli paste easily or cheaply, so instead of the chilli paste and sugar in the original recipe, I use the sweet chilli sauce
  • I’m still working on sourcing affordable dashi stock granules that don’t contain flavour enhancers, and I don’t always have time to make dashi stock from scratch during semester, so I tend to generally just use chicken stock. Dashi tastes better, but chicken is definitely my second favourite
  • I don’t strain the soup after boiling it because I’m all about minimal dishes and minimal effort – and I don’t mind having the bits of ginger and garlic in the finished product

I would usually have a soft-boiled egg with this too, but I hadn’t made any when I decided I wanted ramen for lunch. I’ll share the recipe I use for the ramen soft-boiled eggs a bit later when I make them again 🙂

It’s easy enough to make this recipe vegetarian – use a vege stock cube instead of chicken, or use “vegetarian dashi” (dashi made with konbu and shiitake mushrooms instead of bonito flakes) and use some firm tofu in place of the bacon and/or eggs (depending on whether you’re vegetarian or vegan I guess).

I’ve never made this for Hubby, as he’s not really a fan of soup or noodles, and I’d rather not go to a heap of effort when I know he isn’t even going to drink the soup (he’d just eat the noodles and bacon and be done with it. What a waste!).

~K

Alphabet Soup

I usually make my own Minestrone Soup, but I felt like trying someone else’s take on that sort of soup, so I made this Alphabet Soup recipe from Big Girls Small Kitchen.

The verdict from Hubby and myself is that this one is better 🙂 I might make some adjustments to my recipe in light of this.

That’s not my picture, that’s the one from the BGSK website!

The changes I made were:

  • left out the white wine, because I didn’t have any at home
  • I used risoni pasta instead of alphabet pasta, because that’s what I had in the cupboard already

And again, in case you missed it, here’s the recipe.

~K

Beef & Barley Soup

This is the beef soup I made the other day. I haven’t got a picture of my attempt, because I forgot to take one before I froze it all.

Head over to The Organised Housewife for the full recipe (give credit where credit is due!), but I did make one change – instead of swede, I added some extra celery and a cup of dried mixed beans.

Hubby gave this one a 5 star rating, which I’m surprised about – he’s been pretty much sworn off watery soups for the last 5 years, but it seems that he’s coming around to being able to eat them again. As long as there’s meat in them, and it’s not all we’re eating.

(We ate almost nothing but slow-cooker soups for the better part of 6 months back at the start of 2010 when Hubby lost his job, because we honestly had no money. I was working 2 jobs as well as studying full-time, and my pay barely covered the rent and other bills, never mind food! I was feeding us on less than $30 a week. I hope I never have to do it again.)

~K

Easy (Cheap) Minestrone

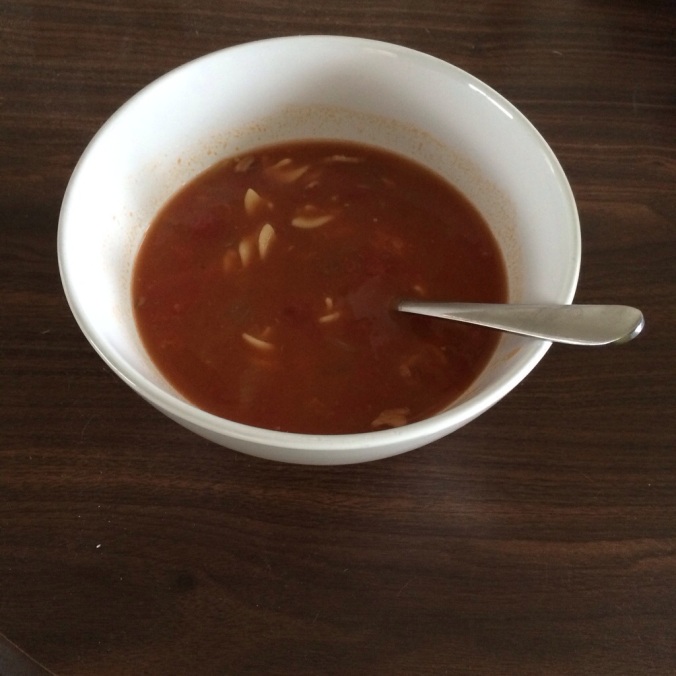
So, I made this yesterday. The recipe varies a bit each time I make this, depending on what I have in the pantry – but this is the basic template.
In my big slowcooker (6L), this makes about 12 serves.

Basic ingredients
– 2x 440g cans diced tomatoes
– 2 cups of various dried beans/legumes/soup mix (soup mix has split peas, barley and a few types of beans in it) (or canned beans – you’d need 2-3 cans)
– 1 stock cube (or replace 500ml of the added water with premade
– 1 brown onion, finely chopped
– 250g dry pasta
– seasonings/herbs to taste (I generally add worcestershire sauce and some mixed herbs)

Optional extras
– diced bacon
– various veges (celery, swede, turnip, potato, carrot, spinach, cabbage, WHATEVER). Hard veges and spinach/cabbage should be added at the start of the process. Frozen veges should be added with the pasta (or they’ll go to mush)

Method
1. If you’re using dried beans, set them to soak for at least an hour (but overnight is best) before starting this recipe. Adding a tsp of bicarb to the water helps them rehydrate quicker. Make sure you rinse them before adding to the slow cooker.
2. Put everything except the pasta into a slow cooker. Add about 2-3L of water and set to Low. Leave for about 8hrs (flexible time here, I left the lot I made yesterday for 12hrs purely because I went out and was out for longer than I planned).
3. About 1/2hr before serving, add pasta and seasonings to taste. Set cooker to High and leave for an additional 30-45mins, or until pasta is al dente.

This freezes fantastically, and I’d happily eat it every day for lunch during winter 🙂
If you dont have a slow cooker, this can be made on the stove, you just have to keep an eye on it so it doesnt burn or boil over. Bring to boil then reduce to lowest heat setting, leave (stirring occasionally) until beans etc are cooked through, then add pasta.
For a smaller pot, just halve all measurements (except the onion – just use the whole thing, it’s easier).

20140619-150836-54516595.jpg