Rainbow Steak

thumb_IMG_2790_1024

If you follow me on Instagram, you probably saw this earlier in the week when I originally made it.

It was a roaring success – it tasted EXACTLY like the version we get from our favourite takeaway place, but without all the deep-fried-ness (they deep-fry the steak). Rainbow Steak is Hubby’s favourite takeaway dish, and this passed muster – he gave it 5 stars 🙂

Don’t be scared off by the ingredient list – it looks long and involved, but this is actually really easy to make. The original recipe came from here, but I adjusted it a bit. I used half the amount of meat, but heaps of veges. I also halved the amount of sugar in the sauce.
Also to note – the 1/2 capsicums didn’t go to waste, I used the rest a few days later in another stir fry. You can just use one colour of capsicum if you want, but it won’t look as pretty and colourful. I got a 3-pack of different coloured ones on special at the vege shop 🙂

Serves: 6 (with rice)

Ingredients:

  • 300g steak, thinly sliced
  • 1/2 red capsicum, thinly sliced
  • 1/2 green capsicum, thinly sliced
  • 1/2 yellow capsicum, thinly sliced
  • 2 brown onions, thinly sliced
  • 2 carrots, peeled and sliced into thin sticks (about the same size as capsicum slices)
  • 2 tsp minced ginger
  • 2 cloves garlic, crushed

Marinade for steak

  • 1/2 tbsp minced ginger
  • 1/2 tbsp crushed garlic
  • 1/2 tbsp oyster sauce
  • 1/2 tbsp mirin
  • 1 tsp oil
  • 1/2 tbsp bicarb soda
  • 1/2 tbsp cornflour
  • 1/2 tbsp rice wine vinegar

Sauce

  • 4 tbsp tomato sauce
  • 1 1/2 tbsp worcestershire sauce
  • 1 tbsp BBQ sauce
  • 2 tbsp hoisin sauce
  • 1/2 tbsp sweet chilli sauce
  • 1/2 tsp oil
  • 1/4 cup caster sugar

Method:

  1. Slice steak and mix together the marinade ingredients. Marinate the meat for at least 2 hours, preferably overnight.
  2. Combine sauce ingredients in a bowl and set aside.
  3. Heat wok over high heat with a little oil, and cook steak in batches until just browned. Remove from pan and set aside.
  4. Cook carrots until beginning to soften, then add capsicum and onion. Cook until onions begin to turn translucent.
  5. Return meat to wok, add sauce and simmer for a few minutes (until heated through and slightly thickened).

Like just about everything I make, this freezes well.

Taco Casserole

Taco Casserole

You can’t really see the casserole too well – you can just spy it at the top of the bowl, near the fork.

This is really easy to make, and freezes well, so you can have it ready in the freezer for whenever you have a taco craving!

Serves: 8

Ingredients:

  • 500g beef mince
  • 1 medium onion, finely chopped
  • 400g can tomatoes
  • 500ml beef stock
  • 1 cup dried beans, soaked and precooked (use whatever beans you like. I used half black beans and half black-eyed beans)
  • 1 packet taco seasoning
  • 4 tbsp chunky salsa + extra for topping
  • 1 cup uncooked rice
  • 1 cup frozen corn
  • Whatever toppings you want! (I used cheese, lettuce, tomatoes, sour cream, avocado, and some extra salsa)

Method:

  1. Heat a large, heavy-bottomed pot with a tight-fitting lid over medium heat with a little oil of your choice (my personal preference is rice bran oil). Cook mince until mostly browned, then add onions and cook until they are translucent.
  2. Reduce heat to med-low. Add tinned tomatoes, stock, taco seasoning, salsa, beans and corn. Stir and bring to boil.
  3. Add rice and bring to boil again, then reduce heat to low. Cook (covered) for 30mins (or until rice is cooked through), stirring occasionally so the rice doesn’t stick to the bottom of the pot. Rice dries out the older it gets, so if you’ve had your rice for a while (i.e. 6mths+) it will likely take longer than the 30mins.
  4. Serve with whatever toppings you like.

NB: Freezes well

After I made this, we ate it 3 times in the same week! It passed the “Hubby test”, and he gave it 5 stars 🙂 I will be making this again very soon, and I’ll try to remember to take a picture of the finished product before I put toppings on.

Budget Tip!
If meat is too expensive (or you’re vegetarian) you can replace the beef mince with an additional cup of dried beans without losing much in the way of flavour.
Vegetarian note – I use Massel brand stock cubes, which are gluten & dairy free as well as being vegan. They are “beef style” and “chicken style”, but do not contain any animal products – the taste and colour of the different stocks is created using herbs and vegetable extracts.

~K

Mini Cabbage Rolls

This is not my picture, because I accidentally left mine cooking for a little too long – and the way they now look, “Zombie Meatballs” would be a better description :S (Mine are featured in this bento).

Here is the recipe! (From JustBento.com)

The only thing I can say is that I will not be using wombok cabbage next time – the leaves were way to flimsy. I’ll just get a normal cabbage (the leaves are slightly thicker on a normal cabbage, so I figure they’ll be less likely to fall apart).

Very yummy, but Hubby was decidedly creeped out by them haha – at least I know that I’ll get to eat them myself!

I’ve also managed to convert my Mum to bento lunches – she usually has 2 or 3 international students, and she makes lunch for them to take to school/uni/whatever, and when I showed her what I did for lunches she thought it was the best idea ever, so now she’s started doing that for the students 🙂 They like it a lot, as they’re all Chinese/Japanese, so the whole lunchbox-with-rice thing is very familiar for them, and they like that they get a mix of what they’re used to as well as new stuff.

~K

Another Bento…

IMG_2311

So here we have the bento I actually ate on Friday (I just hadn’t gotten around to posting it until now).

We have the usual veges, plus some leftover spaghetti bolognese from last night’s dinner (about 1/2 cup pasta and 1/2 cup bolognese sauce).

The soup is a packet one that is a particular favourite of mine, but I don’t often get it because they are usually a bit pricey (they were on special this week so I got a couple).

~K

Bolognese Muffins

IMG_2274-1

Yes they are xmas muffin cases – it was all I had left haha


These are fantastic as an easy breakfast option! Eaten as-is they’re great, but they’re even better if you warm them up in the microwave for 30 seconds, then put some butter on them OM NOM NOM NOM.

Be warned, any pets you have will probably pester you the entire time these are cooking (Jacket was convinced that I was cooking something that he’d like and that I wasn’t sharing… I eventually showed him the empty container the bolognese had been in and he was like “oh – that’s not what I wanted” and went to chase some bugs).

Original recipe is from here, but I made a few changes to simplify it and reduce the batch size. I halved the batch because I didn’t know if Hubby would eat these, and if I made more they might go yuck before I ate them all.

Makes: 6 muffins

Ingredients:

  • 1 cup bolognese sauce
  • 1/2 cup grated parmesan cheese + extra for topping muffins with
  • 1 cup Self Raising flour
  • 1/4 cup milk
  • 1 egg
  • 1/8 cup oil (I don’t actually know how much oil this would be in ml, I just eye-balled the amount)

Method:

  1. Ensure bolognese sauce is completely defrosted (if it was frozen). Don’t use sauce that is still piping hot, as you’ll scramble the eggs. Preheat oven to 180°C. Line 6 holes of a 12-hole muffin pan with muffin cases.
  2. Combine flour and parmesan cheese in a bowl. Whisk together egg, milk and oil in a separate bowl.
  3. Add egg mixture and bolognese to flour and mix until just combined.
  4. Divide into prepared muffin tray, and top with additional parmesan cheese.
  5. Bake for 20-25mins or until golden and firm to touch. Cool in tray for 5mins before transferring to a cooling rack.

~K

Today’s Lunch

IMG_2292 IMG_2293

There’s 2 separate photos because the rice was still cooking, but I wanted to eat the miso soup 🙂

What have we got today?

  • Miso soup with some sliced spring onion (I keep a bag of sliced spring onion in the freezer, you never know when you’ll want it)
  • 3 mini cabbage rolls (which look a little less than optimal, because I forgot about them while they were cooking – the leaves went a little too soggy) – recipe from JustBento
  • Salad
  • Rice with peas (I just added a 1/4 cup frozen peas to the rice at the start of the cooking process)

Total calories: 505

All in all, a quick lunch 🙂

I made the cabbage rolls in advance and froze them in sets of 3, and salad was leftover from the BBQ we had on the weekend.

~K

Beef Stroganoff

IMG_8051

This is an easy one to make, and it contains heaps of veges 🙂 This is a favourite in our house!

Serves: 8 (If you have big eaters, you may only get 5-6 serves. Neither myself or Hubby are big eaters)

Ingredients:

  • 500g beef strips
  • 2 tbsp plain flour
  • 2 tsp paprika
  • 1 brown onion, diced
  • 2 cloves garlic, crushed
  • 450g jar roasted capsicum, sliced (or 2 fresh red ones)
  • 200g mushrooms, thinly sliced
  • 1 zucchini, thinly sliced
  • 3/4 cup beef stock
  • 400g tin tomatoes
  • 2 tbsp tomato paste
  • 1 tbsp Worcestershire sauce
  • 2/3 cup sour cream

Method:

  1. Toss beef with flour and paprika to coat. Allow to sit while prepping other ingredients.
  2. Heat fry pan over med-high heat, and cook beef until just browned. Transfer to a heatproof bowl and set aside.
  3. Cook onion and garlic until softened, then add other veges. Cook until mushrooms are softened.*
  4. Return beef to pan and add stock, tomatoes, tomato paste, and Worcestershire sauce. Stir well and bring to a simmer. Add sour cream and stir through, then remove from heat.

*If you are using fresh capsicum, add them when you add the onion.

This can be served with just about anything – I usually do it with pasta, but you can also use potatoes, rice, quinoa, couscous, just about ANYTHING that vaguely resembles a white carbohydrate!

Make sure that you do follow the directions as they are – if you don’t brown the beef then set it aside to rest, it can get VERY tough and chewy, particularly if you are saving money and getting the cheaper cuts of meat.

This freezes well, but the sauce can sometimes separate a little during the defrosting process (this is due to the sour cream).

~K

Slow Cooker Corned Beef

I’m making this for tea tonight, so I haven’t got a picture yet, but it tastes fantastic. The sauce in this recipe is seriously THE BEST I have ever had – I seriously actually like this more than the corned beef & accompanying sauce that my Mum always makes.

Ingredients:

  • piece of corned beef (also known as silverside) – whatever size piece your slow cooker will fit is best, my 6L pot fits a 2kg one comfortably
  • 1 small onion
  • 8 whole cloves
  • 500g small potatoes, halved
  • 1 tbsp brown sugar
  • 1 tbsp malt vinegar
  • 8 black peppercorns
  • 2 bay leaves

Mustard and Parsley Sauce

  • 1 egg
  • 2 tbsp caster sugar
  • 1 tbsp plain flour
  • 1 tsp mustard powder
  • 60ml (1/2 cup) malt vinegar
  • 2 tbsp finely chopped flat-leaf parsley

Method:

  1. Slice potatoes in half, and place across bottom of slow cooker. Trim excess fat from the corned beef, and place corned beef on top of sliced potatoes.
  2. Skin onion and take off the ends. Insert the cloves into the onion – it’s easiest to do this around the top and bottom of the onion.
  3. Place the onion, bay leaves and peppercorns into the slow cooker, and then fill with cold water until it just covers the corned beef.
  4. Get a bit of hot water (about 1/2 a cup) and stir in the brown sugar and malt vinegar until the sugar dissolves, then add to the slow cooker.
  5. Cook on low for 8-10 hours, or until beef is tender and cooked through. Remove beef from slow cooker and set aside, covered, while you cook the sauce. Also fish out the potatoes and put them in a separate covered container until ready to serve. Discard the onion.
  6. Making the Mustard Sauce: Take 1 cup (250ml) of cooking liquid and put aside. Combine the egg and sugar in a small bowl, then stir in flour and mustard powder. Gradually add the reserved cooking liquid and vinegar, stirring until smooth. Transfer to a small saucepan, and stir over medium heat until thickened. Stir through parsley*.
  7. Slice corned beef and serve!

* If using fresh parsley, stir it through at the end. If using dried parsley, add it when you put the sauce on the stove to thicken.

This recipe freezes well (sauce included), and the corned beef is fantastic to have on sandwiches as well.

I generally serve this with various steamed veg. The cooking time is fairly variable – I’ve cooked this for as long as 12hrs, and the only issue I had was that it fell apart a bit when I sliced it up. I also usually double the sauce recipe, because I REALLY like the sauce.

This recipe is only a “cheap eat” when corned beef is on special. Normally, corned beef costs about $9-10/kg. I got the lump I used for this for $7/kg, but I’ve been able to get it for as cheap as $4/kg sometimes. If you buy it from the butcher, often they’ll even slice off most of the fat if you don’t want to do it yourself (just don’t go during peak shopping times – they won’t do it if there’s lots of customers to be served).

~K

Beef & Barley Soup

This is the beef soup I made the other day. I haven’t got a picture of my attempt, because I forgot to take one before I froze it all.

Head over to The Organised Housewife for the full recipe (give credit where credit is due!), but I did make one change – instead of swede, I added some extra celery and a cup of dried mixed beans.

Hubby gave this one a 5 star rating, which I’m surprised about – he’s been pretty much sworn off watery soups for the last 5 years, but it seems that he’s coming around to being able to eat them again. As long as there’s meat in them, and it’s not all we’re eating.

(We ate almost nothing but slow-cooker soups for the better part of 6 months back at the start of 2010 when Hubby lost his job, because we honestly had no money. I was working 2 jobs as well as studying full-time, and my pay barely covered the rent and other bills, never mind food! I was feeding us on less than $30 a week. I hope I never have to do it again.)

~K

My Spaghetti Bolognese

20140709-190632-68792235.jpg

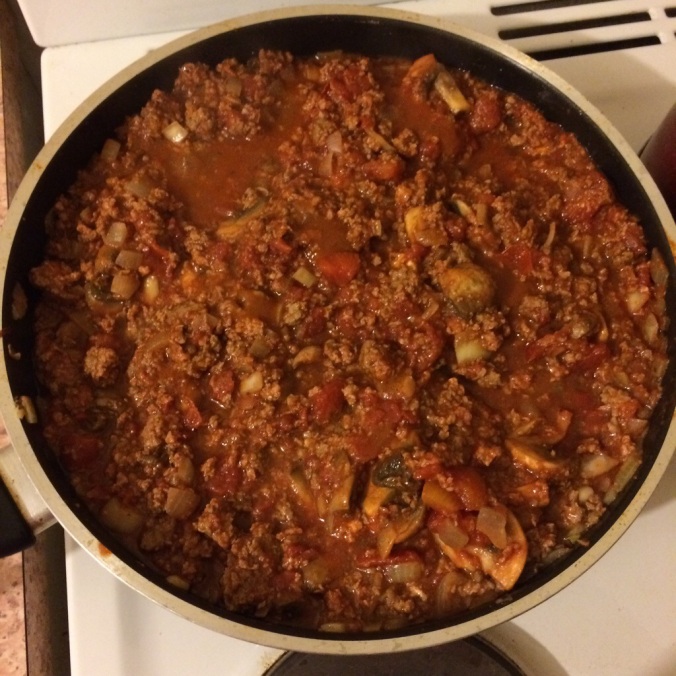
Firstly – I am not known for making ATTRACTIVE foods. However, this has been a family favourite since I started making it when I was about 12 (apparently my brothers liked it better than my Mum’s recipe, because it is more ‘tomato-y’). This recipe makes 6-7 serves for myself and Hubby, but he isn’t a ‘big eater’. Just a reminder that any measurements for “loose ingredients” are approximate – I tend not to measure anything :S If I say can/packet/tub/etc, I will specify how much the package contains in Australia.

Ingredients

  • 500g beef mince
  • 1 x 440g can diced tomatoes
  • 90g tub tomato paste (or near approximation in ‘blobs’ from a larger container)
  • 1 brown onion, finely chopped
  • 1 tbsp minced garlic
  • 100g sliced mushrooms
  • herbs/spices/seasonings to taste
  • 500g packet dry pasta (whatever shape/size)

Optional extras (for most of these, every 2 cups of extras will mean an additional measure of diced tomatoes, tomato paste, onion & garlic)

  • red lentils (about 1 cup for every 500g mince – stretches meal to a further 3-4 servings). Pre-cook these (until almost cooked through) if you’re using them, it makes it a lot easier.
  • Other veges – spinach & capsicum get added as-is, but I’ve been known to mash up various other veges (carrots, cauliflower, broccoli, zucchini, pumpkin) after they’ve been steamed and ‘hide’ them in the sauce – this started as a method of getting kids I was babysitting to eat their veges

Method:

  1. Fill pot you’re using to cook the pasta with water and a bit of salt and put it on to boil. In a frypan or wok, heat some oil and add chopped onion and crushed garlic. Cook until onion is softened and translucent. Add mince and cook until browned.
  2. Add mushrooms & other “solid” veges (i.e. not the mushed-up ones) and cook until softened.
  3. By this point, the water in my pasta pot is usually boiling. Add pasta and cook until al dente, stirring occasionally to stop it sticking together and testing pasta every minute or so after it starts to look “ready”.*
  4. Add tinned tomatoes, tomato paste & herbs/seasonings/spices to taste, as well as a little bit of water (I just put a bit in the can from the tomatoes and tip it in. I think it’s about 1/2 cup for people who want measurements). Add red lentils and mushed-up veges at this point if you’re adding them.
  5. Simmer, stirring occasionally, until reduced to desired thickness. Add additional herbs/seasonings/spices if desired.
  6. Once pasta is ready, drain but DO NOT RINSE.**
  7. Serve with herbs/parmesan/other cheese as desired.

* As to a specific description of what this looks like, the pasta will look less like the yellow translucent bits that came out of the packet and more like the opaque white-ish colour cooked pasta is. The best way to know what the texture of ‘al dente’ pasta should be is to go to a good italian restaurant and order a simple pasta dish. THAT’S what we’re aiming for with pasta. I find short pastas (like penne & spiral) to be the hardest to stuff up, so if you’re new to cooking pasta (or have had little success in the past), use something like that. Long pastas tend to clump if not cooked correctly, and short/round ones (macaroni, shells, risoni) tend to just go to mush if not cooked correctly.

** Rinsing will remove the starches that help the sauce stick to the pasta. Only rinse pasta when you are going to be using it cold (like for a salad).

This recipe freezes well, and I portion it up into single-serve containers (pasta & sauce).

This could be cooked in a slow-cooker if you wanted to, just follow step 1 then add everything to the slow cooker (without the additional water) and cook Low=8hrs (or High=4hrs).