Epic Cake Fail

So yeah, that didn’t quite go as expected :S

Apparently (according to Dr Google), I was too impatient – I’m used to using metal forms, which you only leave the cake in for about 10-15mins MAX before turning it out. For silicon forms, you have to let it cool completely.

OOPS!

Cake still tastes really good though 🙂 Now I know how to use a silicon form, I will make a much nicer looking cake next time.

This is just the start of my Christmas baking, so there will be much more to come 🙂 My brothers-in-law (brother-in-laws?) are getting baked goods as Christmas presents this year (their wives have not been helpful in gift suggestions, except to say “no alcohol”. So I am baking – because they all love their food haha).

Follow me on Instagram for more baking pictures (and cat pictures. Lots of cat pictures).

~K

Busy Day

Went to the uni medical centre and got my HepB booster, as well as getting all my paperwork signed to say I’ve got all the right vaccinations and serology and stuff. It’s all now submitted, so I’m basically done for that part of my assessment 🙂 I finished one of my recreational reads on the bus on the way home, so I’ve started another one.

I also baked a fruit cake (this recipe), and made some pizza scrolls (completely from scratch, dough and all! Kneading is very therapeutic. Possible Foodie Friday post!)

Then did some various cleaning and watched 3 episodes of Sword Art Online.

Now I’m off to bed, tomorrow is going to be mainly study/homework. I’ve still got a bit of reading to catch up on, and I’ve got to prepare for a mid-semester exam which is at the end of next week.

~K

Easy Stewed Apples

IMG_2367-1

This is the recipe for stewed apples that my Nan makes to put in apple pie, so I learned how to make this when I was about 4 years old.

I’ve never made stewed apples any other way, and it’s sooooo yummy 🙂

I got 2kg of “ugly apples” at the shops this week for quite cheap – they were not so nice for eating normally, so I decided to cook them up instead.

Makes: a lot – 2kg is usually enough to fill 2 family-sized apple pies.

Ingredients:

  • 1.5 – 2 kg of apples (any sort)
  • 1L water
  • 1 1/2 tbsp brown sugar
  • cinnamon (as much as you like)

Method:

  1. Peel, core, & dice all the apples. You want the pieces to be approx 2cm square (1/2 inch). This will take a while, put on a tv show or something while you do it. A good thing to do is to have 2 large bowls in front of you, 1 for the diced apples and 1 for the rubbish.
  2. Once you’ve diced your apples, put them in a large-ish pot. I usually use a 2.5L pot for 1.5kg of apples (If I have more apples, I’ll use my big 5L soup pot). Add the water, sugar & cinnamon to pot, and stir gently. The water will not cover the apples completely, it doesn’t need to.
  3. Cover pot and bring to boil over med-high heat. Once boiling, reduce to medium-low and simmer covered, stirring occasionally, until the apples are soft enough for your liking. I usually cook mine until they’re about the texture of tinned pears.
  4. Take pot off heat and allow to cool for about 15mins, then drain off the water. Apples can now be used for whatever you like!

This recipe freezes well, I like to freeze the apples in muffin trays (see this post for instructions) so that I’ve got convenient 1/3 cup serves of the apples to add to porridge or whatever. They’re also great to eat on their own like you would with normal tinned fruit.

I’ve successfully used these in recipes that call for “tinned pie apples” – just use the amount stated in the recipe.

One of my favourite desserts is some the apples, heated up, with a little bit of vanilla ice-cream – tastes like apple pie, but without all the fuss 🙂

If you want to use the apples for pie/crumble, cook them a little less so they keep their shape and texture once baked.
If you are wanting to make this into apple sauce, leave out the cinnamon and sugar and blend/mash up the apples once you’ve drained them.

~K

Bolognese Muffins

IMG_2274-1

Yes they are xmas muffin cases – it was all I had left haha


These are fantastic as an easy breakfast option! Eaten as-is they’re great, but they’re even better if you warm them up in the microwave for 30 seconds, then put some butter on them OM NOM NOM NOM.

Be warned, any pets you have will probably pester you the entire time these are cooking (Jacket was convinced that I was cooking something that he’d like and that I wasn’t sharing… I eventually showed him the empty container the bolognese had been in and he was like “oh – that’s not what I wanted” and went to chase some bugs).

Original recipe is from here, but I made a few changes to simplify it and reduce the batch size. I halved the batch because I didn’t know if Hubby would eat these, and if I made more they might go yuck before I ate them all.

Makes: 6 muffins

Ingredients:

  • 1 cup bolognese sauce
  • 1/2 cup grated parmesan cheese + extra for topping muffins with
  • 1 cup Self Raising flour
  • 1/4 cup milk
  • 1 egg
  • 1/8 cup oil (I don’t actually know how much oil this would be in ml, I just eye-balled the amount)

Method:

  1. Ensure bolognese sauce is completely defrosted (if it was frozen). Don’t use sauce that is still piping hot, as you’ll scramble the eggs. Preheat oven to 180°C. Line 6 holes of a 12-hole muffin pan with muffin cases.
  2. Combine flour and parmesan cheese in a bowl. Whisk together egg, milk and oil in a separate bowl.
  3. Add egg mixture and bolognese to flour and mix until just combined.
  4. Divide into prepared muffin tray, and top with additional parmesan cheese.
  5. Bake for 20-25mins or until golden and firm to touch. Cool in tray for 5mins before transferring to a cooling rack.

~K

Zucchini Slice


IMG_2070

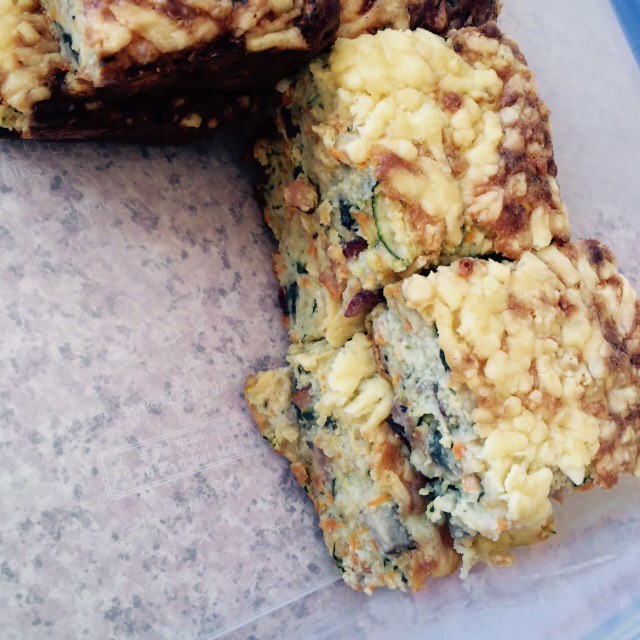
This is how I used one of the enormous zucchini I got this month.

It’s a fairly easy one to make, and it tastes good. It’s great to have in the fridge for lunches.

You can make it as a slice, or in muffin tins for easy pre-portioned serves. The other benefit of making it in a muffin tray is that all of the pieces have nice crispy cheesy edges 🙂 I made this batch in a slice pan because my muffin pans were in use at the time.

*Edit* I ended up eating all of this, Hubby didn’t have a single piece. He’s not a big fan of quiche-like things, so I guess he didn’t even bother trying it. Wuss.

Ingredients:

  • 4 bacon rashers, diced
  • 4-5 button mushrooms, sliced
  • 1 zucchini, grated
  • 1 carrot, peeled and grated
  • 1 cup grated cheese, plus extra to sprinkle on top
  • 1 cup SR flour
  • 4 eggs, at room temperature
  • 1/2 cup milk

Method:

  1. Preheat oven to 180°C. Grease baking pan or muffin tray.
  2. Fry bacon until browned and slightly crispy. Cool slightly.
  3. Combine bacon, zucchini, carrot, cheese, and flour in a bowl. Add eggs and milk, and mix until combined.
  4. Pour mixture into prepared pan and level the surface. Bake for 30 mins, or until a skewer inserted in the middle comes out clean and the cheese is nicely browned. Stand in pan for 5 mins before transferring to a wire rack to cool.

These will also freeze well 🙂 It’s easy to make these vegetarian, by leaving out the bacon.

~K


Boiled Fruit Cake

IMG_2071.JPG

This is a recipe that’s been passed down through our family from my Mum’s grandma (and probably before that, but it’s called “Nanna’s Boiled Fruit Cake” in Mum’s recipe book). I’ve grown up eating this, and it’s one of my favourite sweet things 🙂

The best size cake tin is a round 20cm, or equivalent square (23cm square I think it is). Larger ones make a slightly flatter cake, which can dry out in the oven if you’re not careful. Smaller

Ingredients:

  • 125g butter
  • 500g dried fruit
  • 200g glace cherries
  • 1 cup cold water
  • 1 cup sugar
  • 1 tsp bicarb
  • 1 cup SR flour
  • 1 cup plain flour
  • 2 eggs

Method:

  1. Preheat oven to 180°C. Put butter, dried fruit, glace cherries, water, sugar, and bicarb into medium to large saucepan. Bring to the boil, boil for 2 minutes, then set aside to cool. You’ll need a saucepan that is large enough that the ingredients only fill half of the pan or less, otherwise they’ll boil over (it’s a pain to clean it off the stove if it spills).
  2. Once cooled to almost room temperature, add flour and eggs. Make sure the mix is sufficiently cooled, otherwise you’ll scramble the eggs when you add them (done this several times. There is no resurrecting the mixture if the eggs scramble). Mix until smooth.
  3. Grease and line cake tin, then pour mixture in and smooth top. Bake for approximately 1 hour, until a skewer inserted into the cake comes out clean. Allow to cool in tin for about 5-10mins before turning out onto a cooling rack.

This cake will keep for at least a week, often longer if kept in an airtight container in a cool place.

This makes a fantastic Christmas cake, and I usually make 2 or 3 of these to take to all the family Christmas events.

~K

Tex Mex Muffins

IMG_7012

These are great for breakfast on the go! I think the next time I make them I’ll make a few changes – more salsa, and more cheese. And maybe some taco mince. They weren’t as salsa-ish as I’d hoped, but they still taste great, particularly heated with some butter.

Makes 12

Ingredients:

  • 2 cups self-raising flour
  • 1 tsp baking powder
  • 60g butter, melted and cooled
  • 3/4 cup milk
  • 2 eggs, lightly beaten
  • 1 cup creamed corn (this was approx 2/3 of a 400g-ish tin. I will get the smaller tin next time and just use the whole thing)
  • 1/2 cup tasty cheese
  • 1/2 cup chunky salsa

Method:

  1. Preheat oven to 190°C. Line a 12-hole muffin pan with paper cases.
  2. Sift flour and baking powder into a large bowl (I didn’t bother sifting, I was lazy). Make a well in the centre and add butter, milk, eggs and creamed corn. Mix until just combined. Fold in cheese and salsa.
  3. Spoon mixture into muffin cases. Bake for 20-22 mins or until golden and firm to touch (this took 25mins in my oven). Stand for 5mins before turning out onto a rack to cool.

Recipe from Super Food Ideas magazine, February 2013.

~K

Epic Chocolate Biscuits

20140728-232350-84230422.jpg

I actually made these over a month ago, but the post has been sitting in my drafts folder until I actually had time to add the recipe. I don’t make them very often, because they take a while to make and during term time it’s easier to make things where it’s just mix and bake (muffins and cakes mainly). But I haven’t even done much of that recently! I’ve got a recipe for savoury muffins I’m going to try next week though 🙂

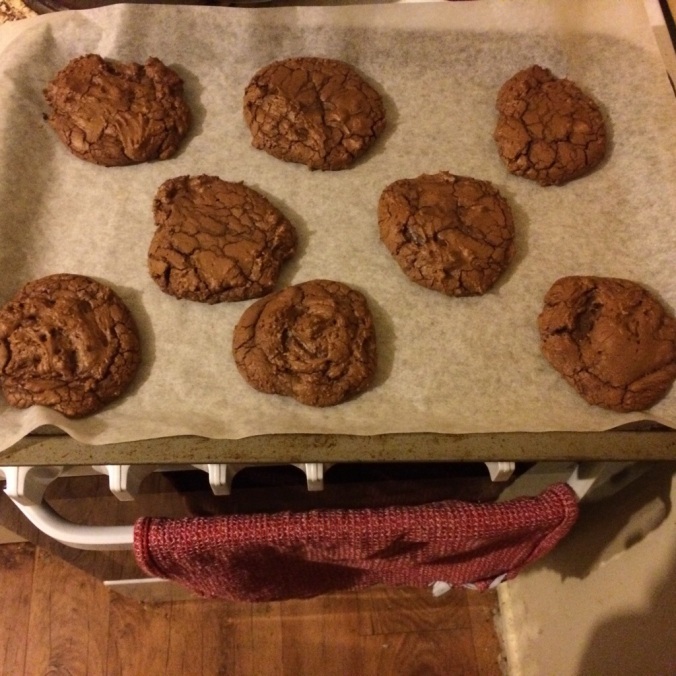
They look a little *suspicious* I guess (see if you can work out what Hubby said they looked like) but they taste FANTASTIC. Gooey, chocolatey goodness 🙂

I have NO CLUE where I got this recipe from. I’ve had it for years, and I’m not even sure any more whether I got it off the net or someone gave it to me. The recipe made about 20 biscuits (ish – very ISH).

Epic Chocolate Cookies

Ingredients:

  • 225g semisweet chocolate, chopped (I use a mix of milk & dark cooking chocolate)
  • 55g butter
  • 2/3 cup plain flour
  • 1/2 tsp baking powder
  • 1/4 tsp salt
  • 2 large eggs
  • 3/4 cup brown sugar
  • 1 tsp vanilla extract
  • choc chips/glace cherries/whatever mix-ins you want

Method:

  1. Preheat oven to 180°C (I think that’s about 370°F – but don’t take my word for it, we don’t use °F). Melt chocolate and butter in the microwave until JUST melted (just enough that you can mix it together). Chocolate melted in the microwave tends to keep its shape, so do it in small bursts and poke at it with something to check how melted it is. If there’s still some chunks of chocolate, but about 3/4 of it is melted, just start mixing. The last of it will generally melt in as you mix.
  2. Mix flour, baking powder and salt together. In a separate bowl beat eggs, sugar and vanilla on high speed until light and fluffy. Reduce speed to low and beat in melted chocolate. Mix in flour mixture until just combined, then add your optional mix-ins.
  3. If the mix is more batter than cookie dough, put it in the fridge for a while until it is more ‘cookie dough’-esque. This should be stiff enough that you can roll it into balls and they will keep their shape, but not rock solid.
  4. Dish out dough onto COLD baking sheets in approx 2cm round balls/lumps. The baking sheets NEED to be cold, otherwise the biscuits will spread too much and you’ll end up with one huge one instead of lots of little ones*. Bake for 10mins, then let sit for a few minutes before transferring to a cooling rack.

I have no idea how long these keep in the cupboard for – they only lasted about 2 days in our house.

~K

* If you only have 1 baking sheet, the last step will just take a little longer. Wait for each batch of biscuits to cool sufficiently before transferring to the cooling rack, then run the tray under cold water until cooled back to room temp. Dry tray, then repeat step 4 until all dough is gone.